KOMOJU - WooCommerce Plugin: Getting Started
This guide provides a step-by-step explanation on how to integrate the KOMOJU WooCommerce plugin. Follow along with the accompanying images to ensure a smooth setup.
📌 Step 0: Register for a KOMOJU Account
- Go to the WooCommerce Introduction Page and register for a KOMOJU account. Having your account ready in advance will make the plugin setup process smoother.
📌 Step 1: Install the WooCommerce Plugin
- Go to the WooCommerce Admin Panel.
- Click Plugins > Add New.
- In the search box, type “WooCommerce”, then install the plugin that appears.
Note: If you do not activate the WooCommerce plugin, the KOMOJU plugin will not function correctly.

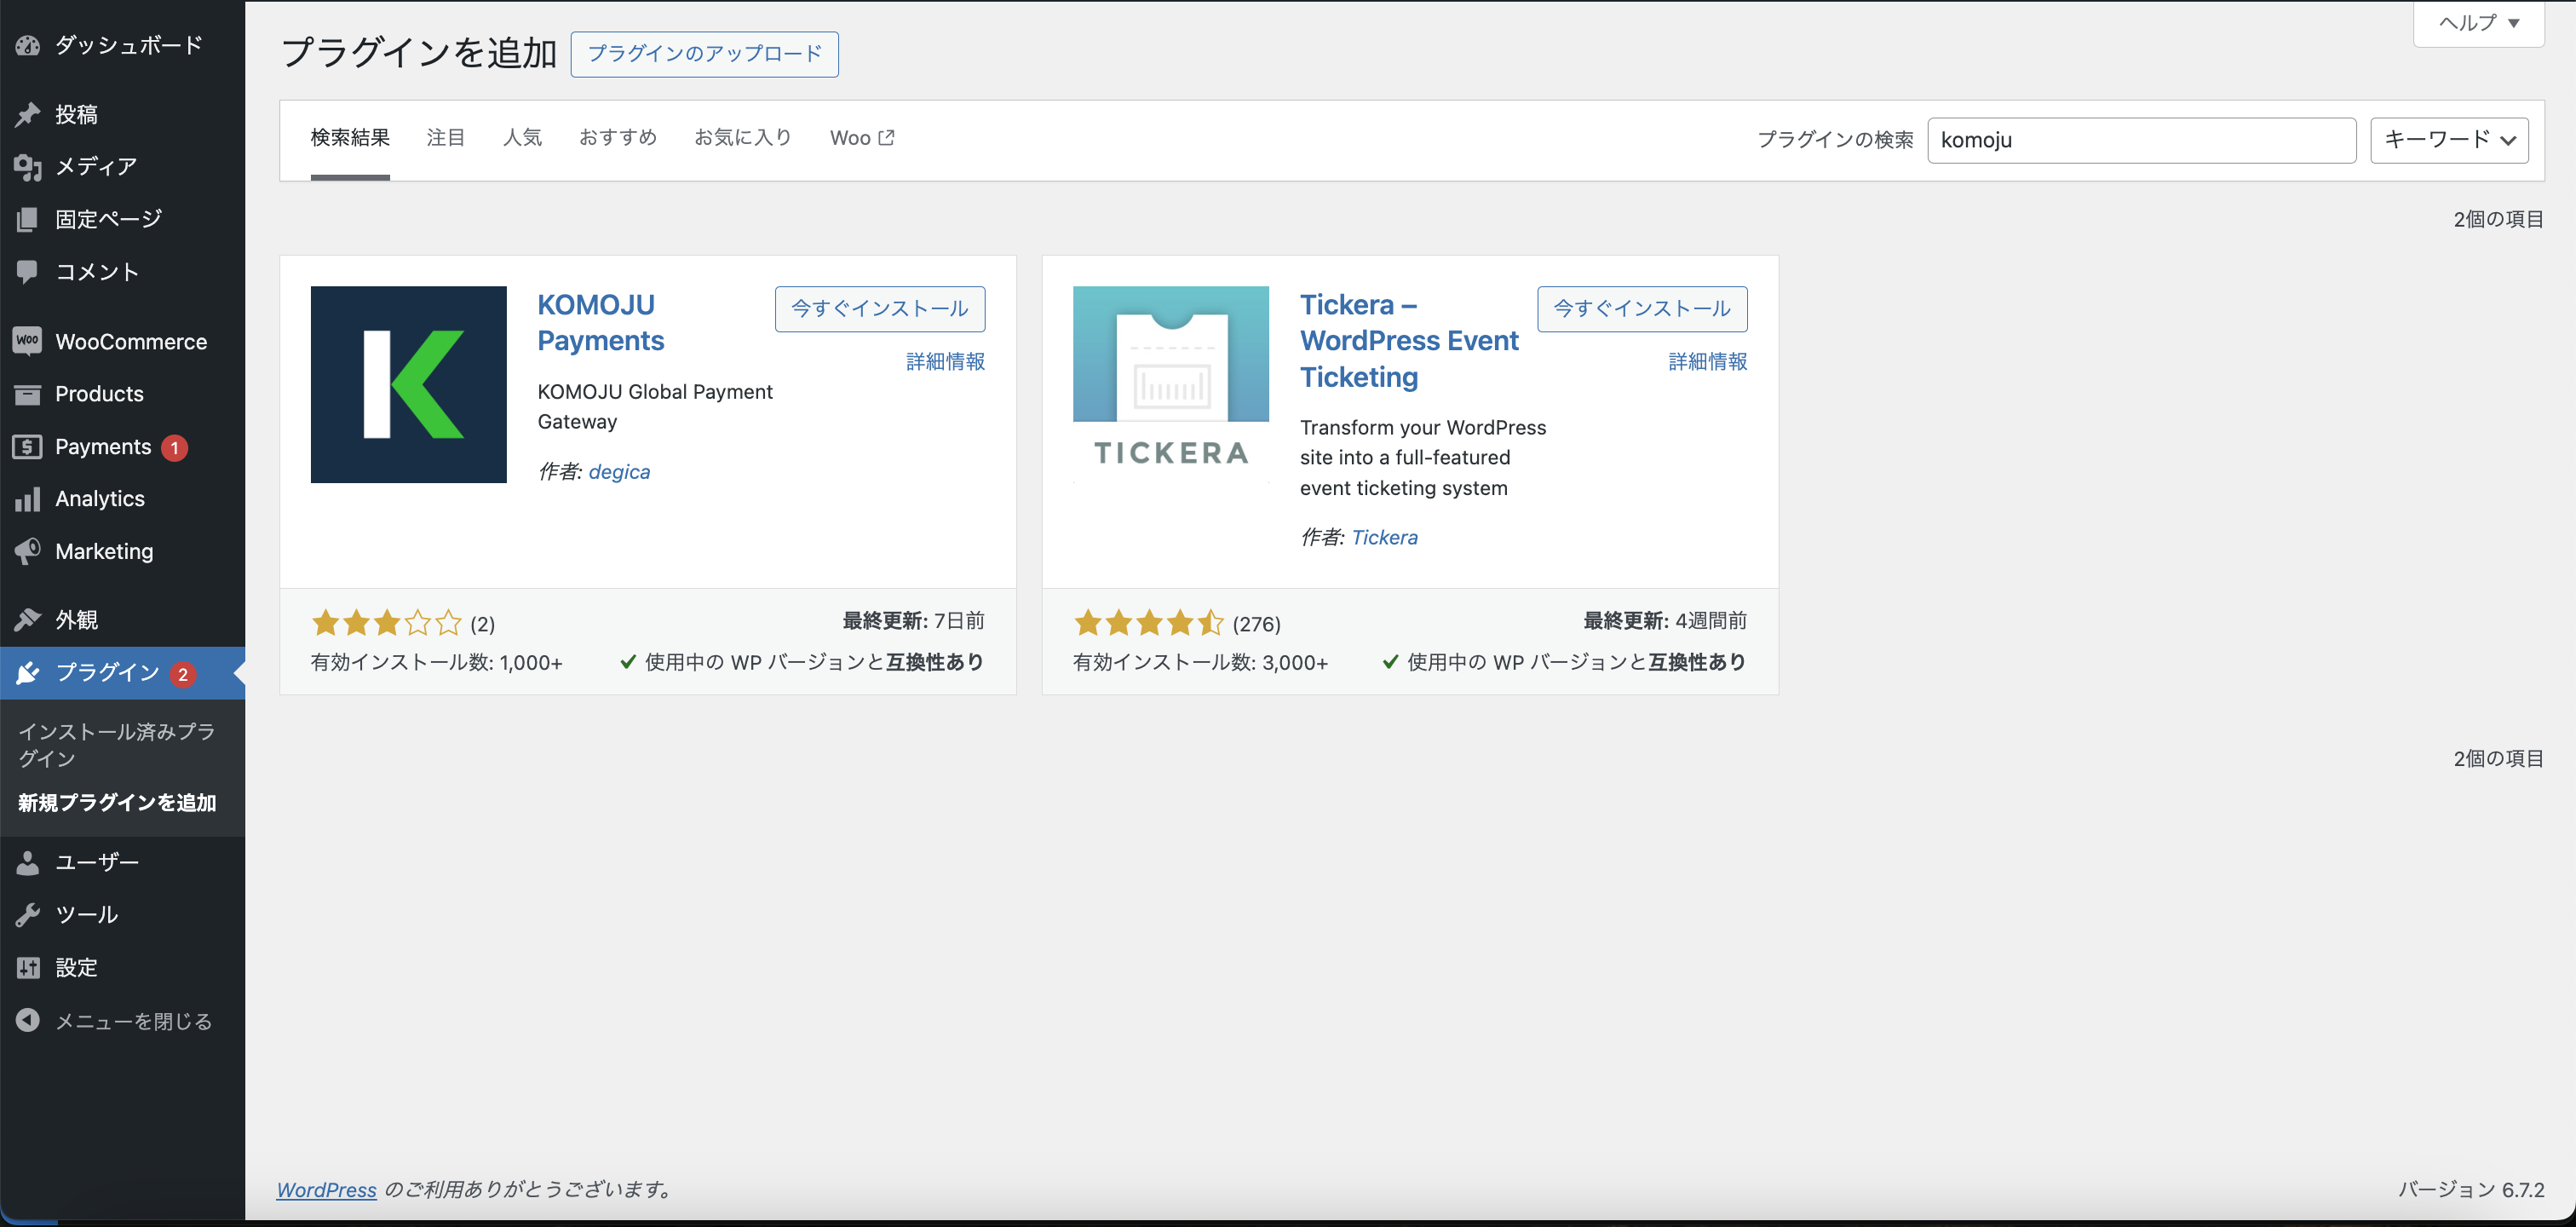
📌 Step 2: Install the KOMOJU Plugin
Here's how to install the KOMOJU plugin on WooCommerce.
- Go to the WooCommerce Admin Panel.
- Click Plugins > Add New.
- In the search box, type “KOMOJU”, then install the plugin that appears.
📌 Step 3: Plugin Activation
- After installation, activate both plugins (WooCommerce / KOMOJU).
- Once activated, you will be able to access the KOMOJU Settings page from the WooCommerce Admin Panel sidebar.
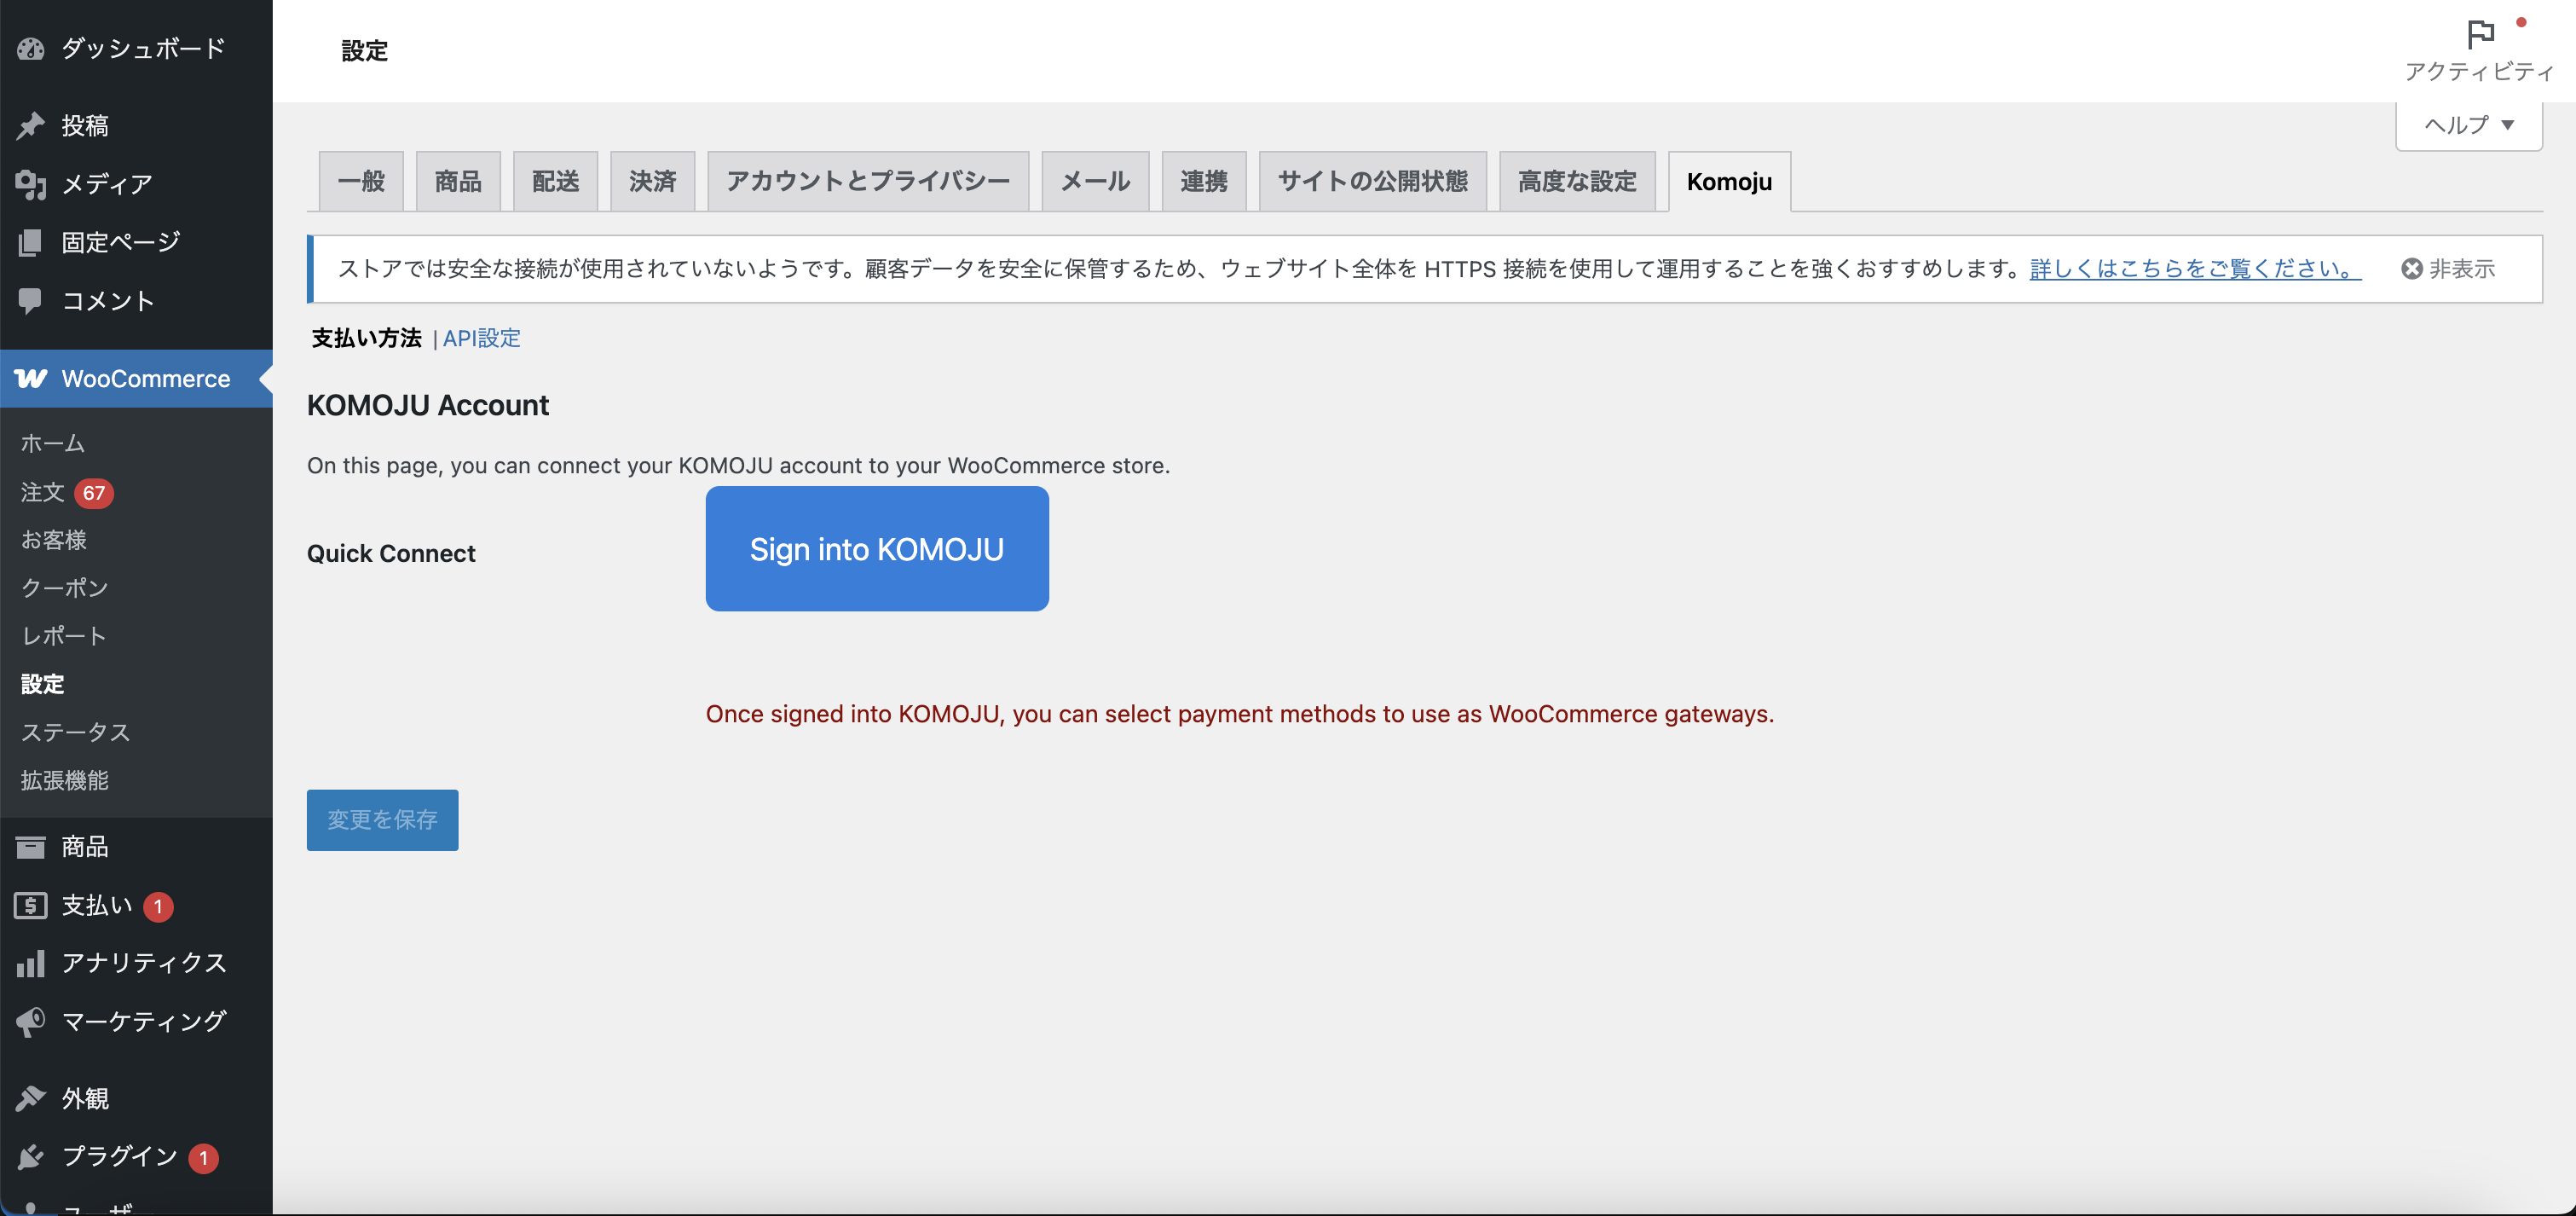
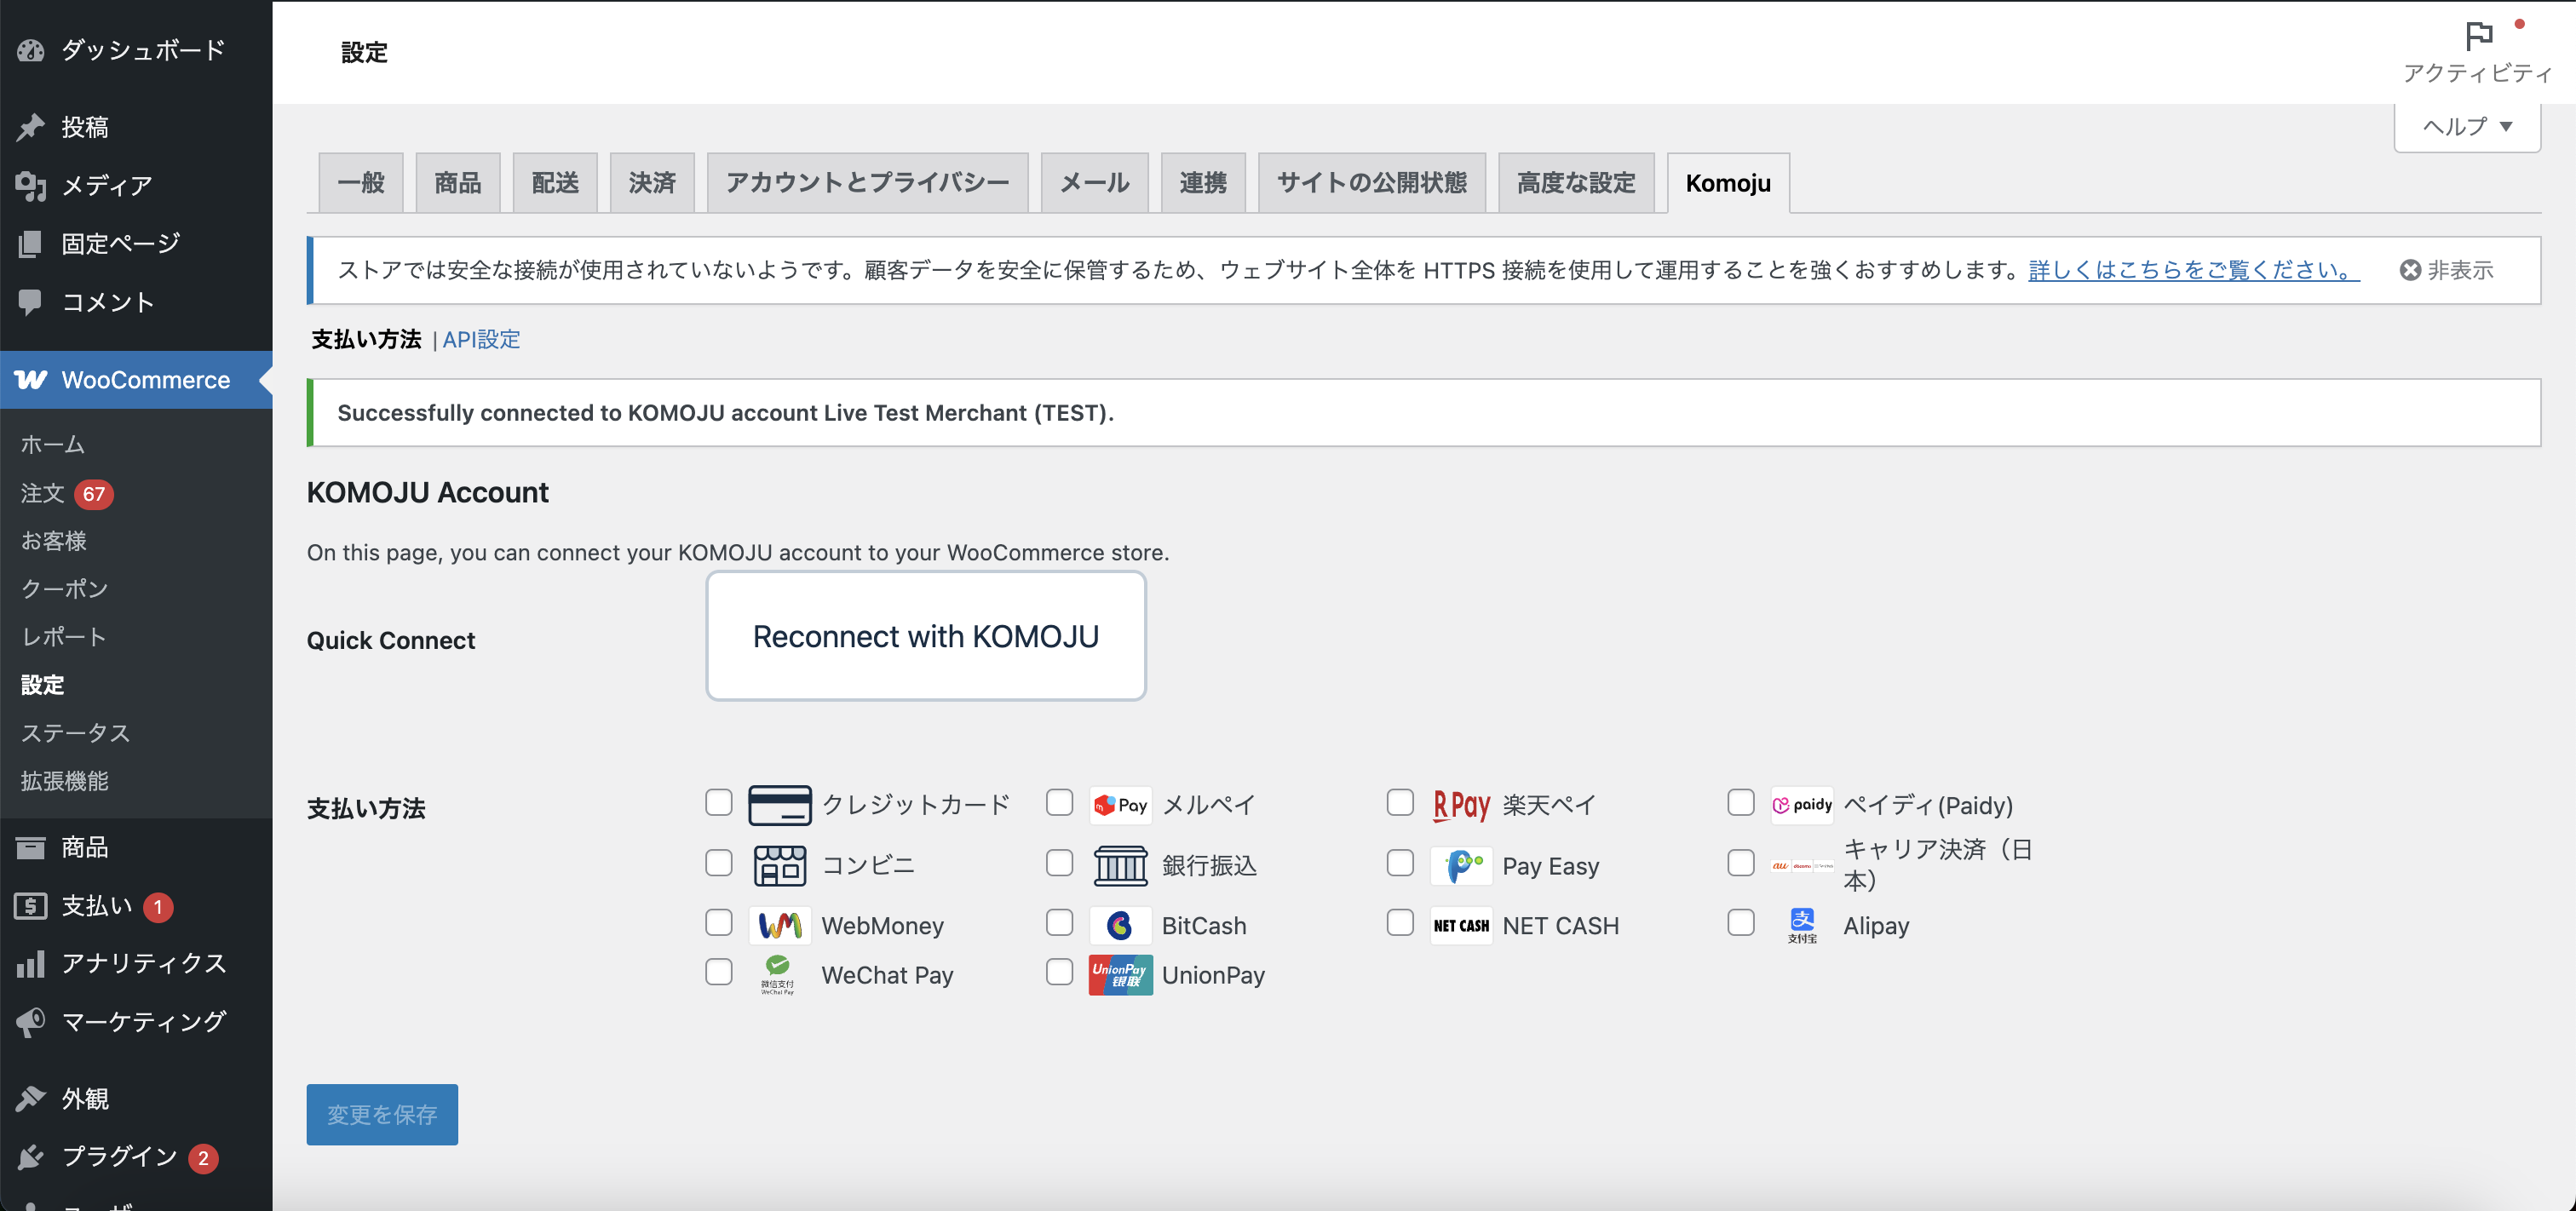
📌 Step 4: Configure the API Key
- Navigate to WooCommerce > Komoju in the menu.
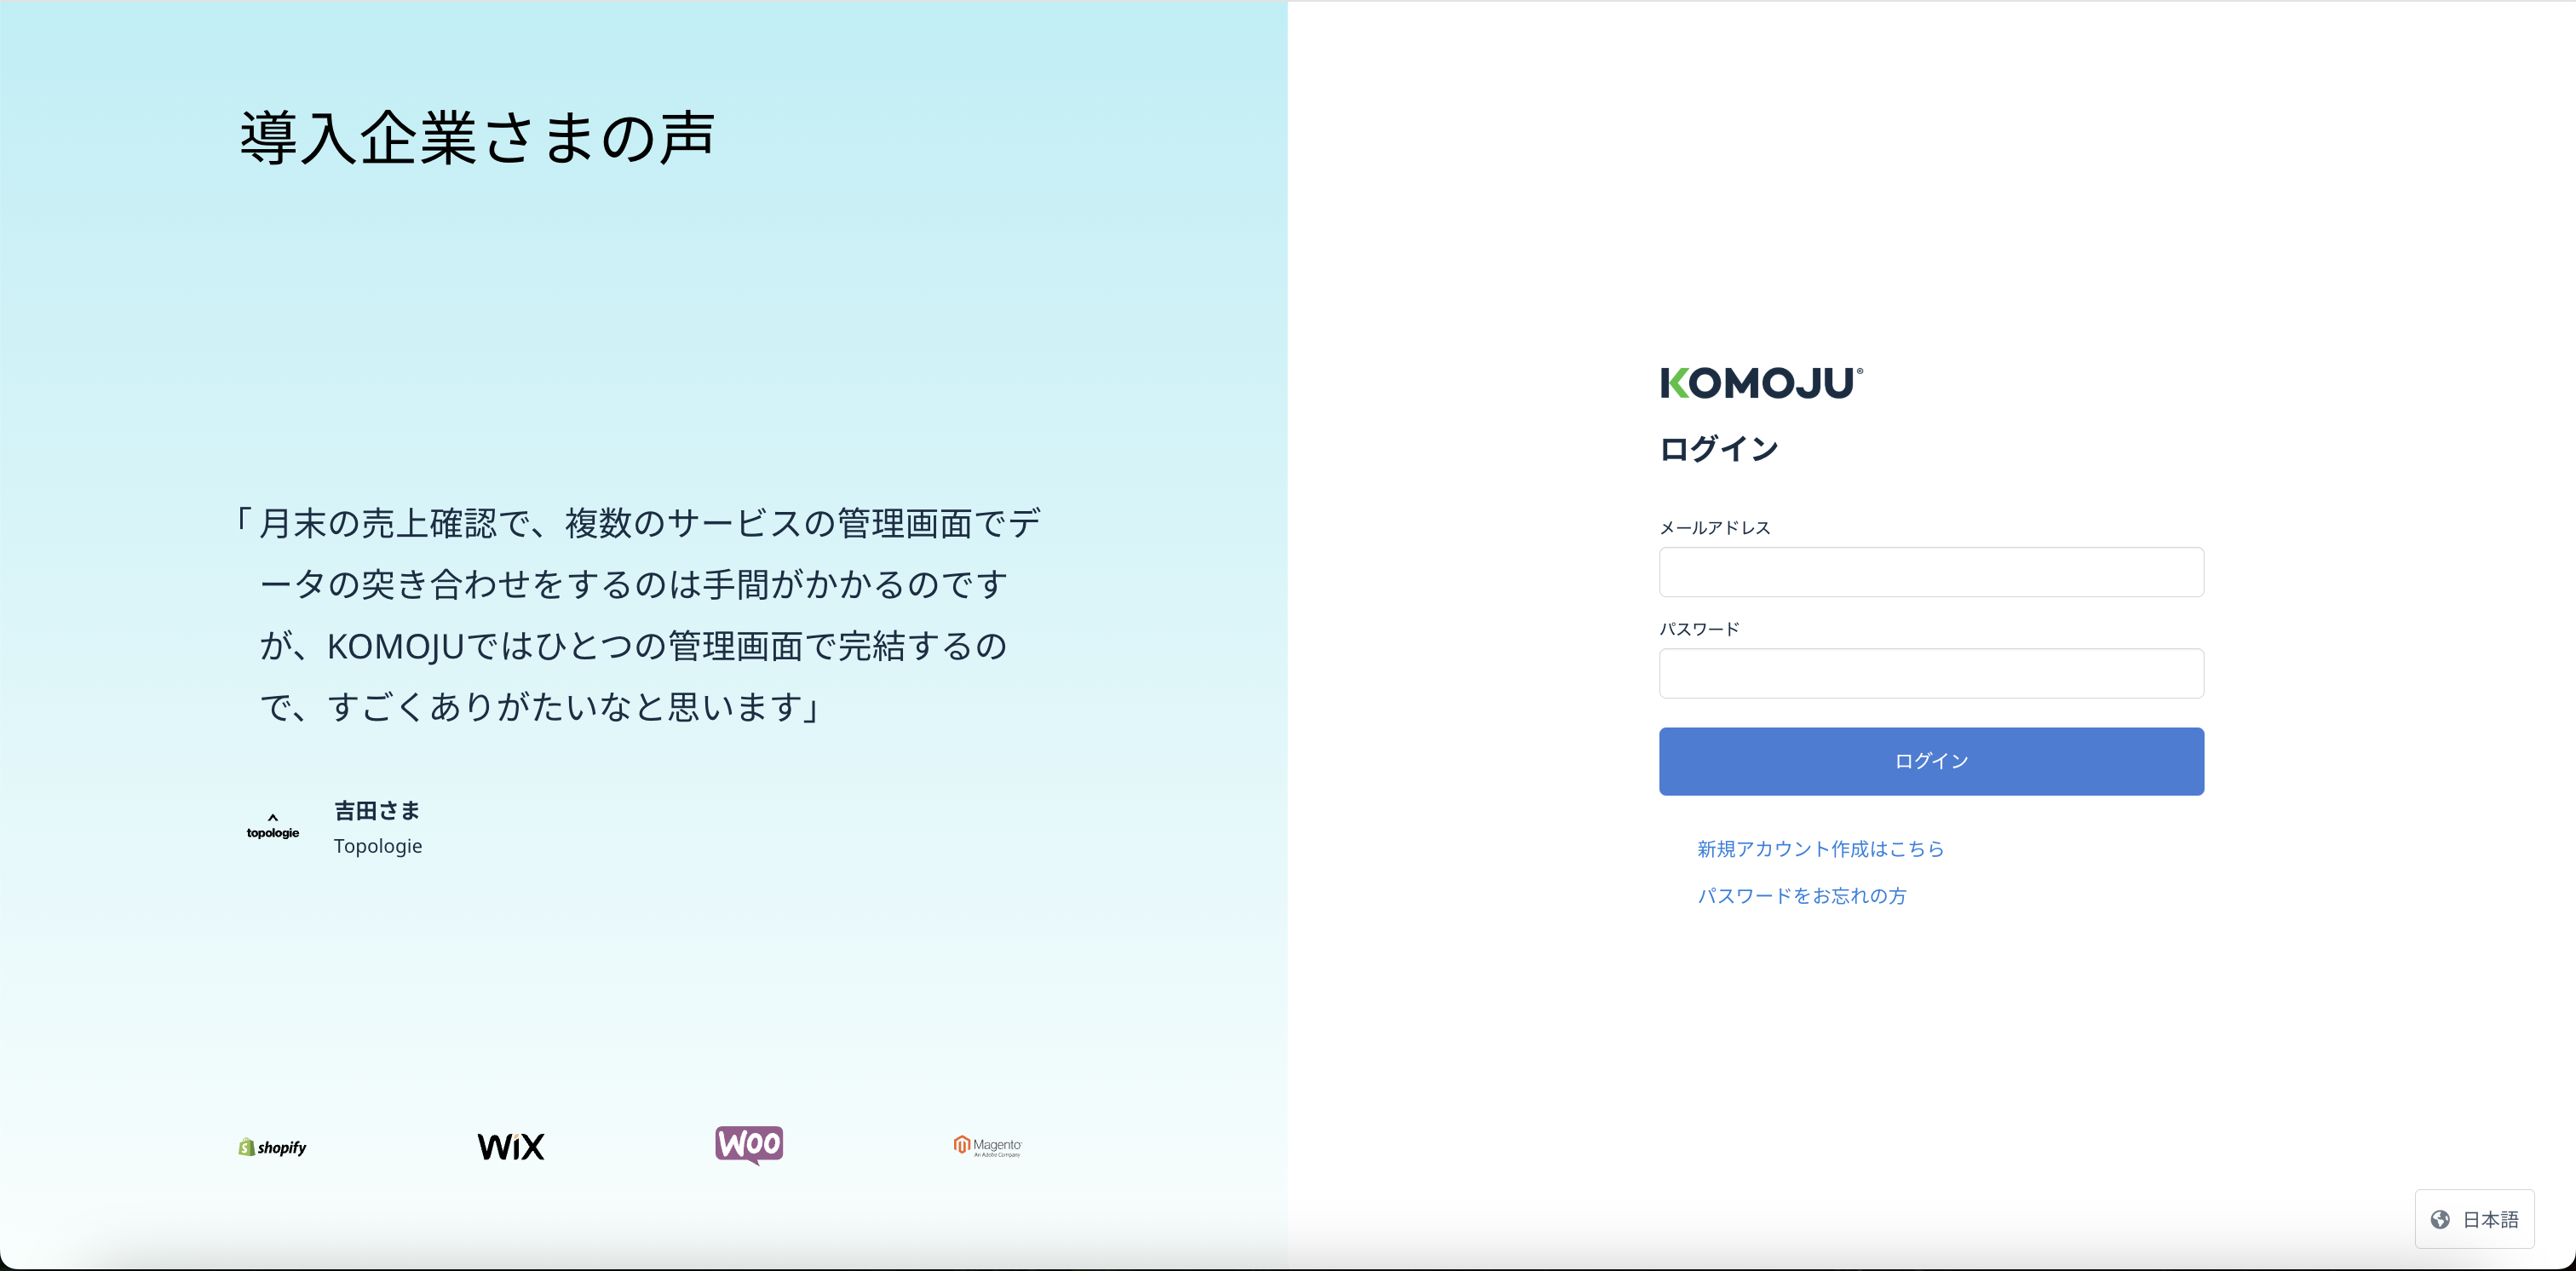
- Log in to KOMOJU and retrieve your API Key.
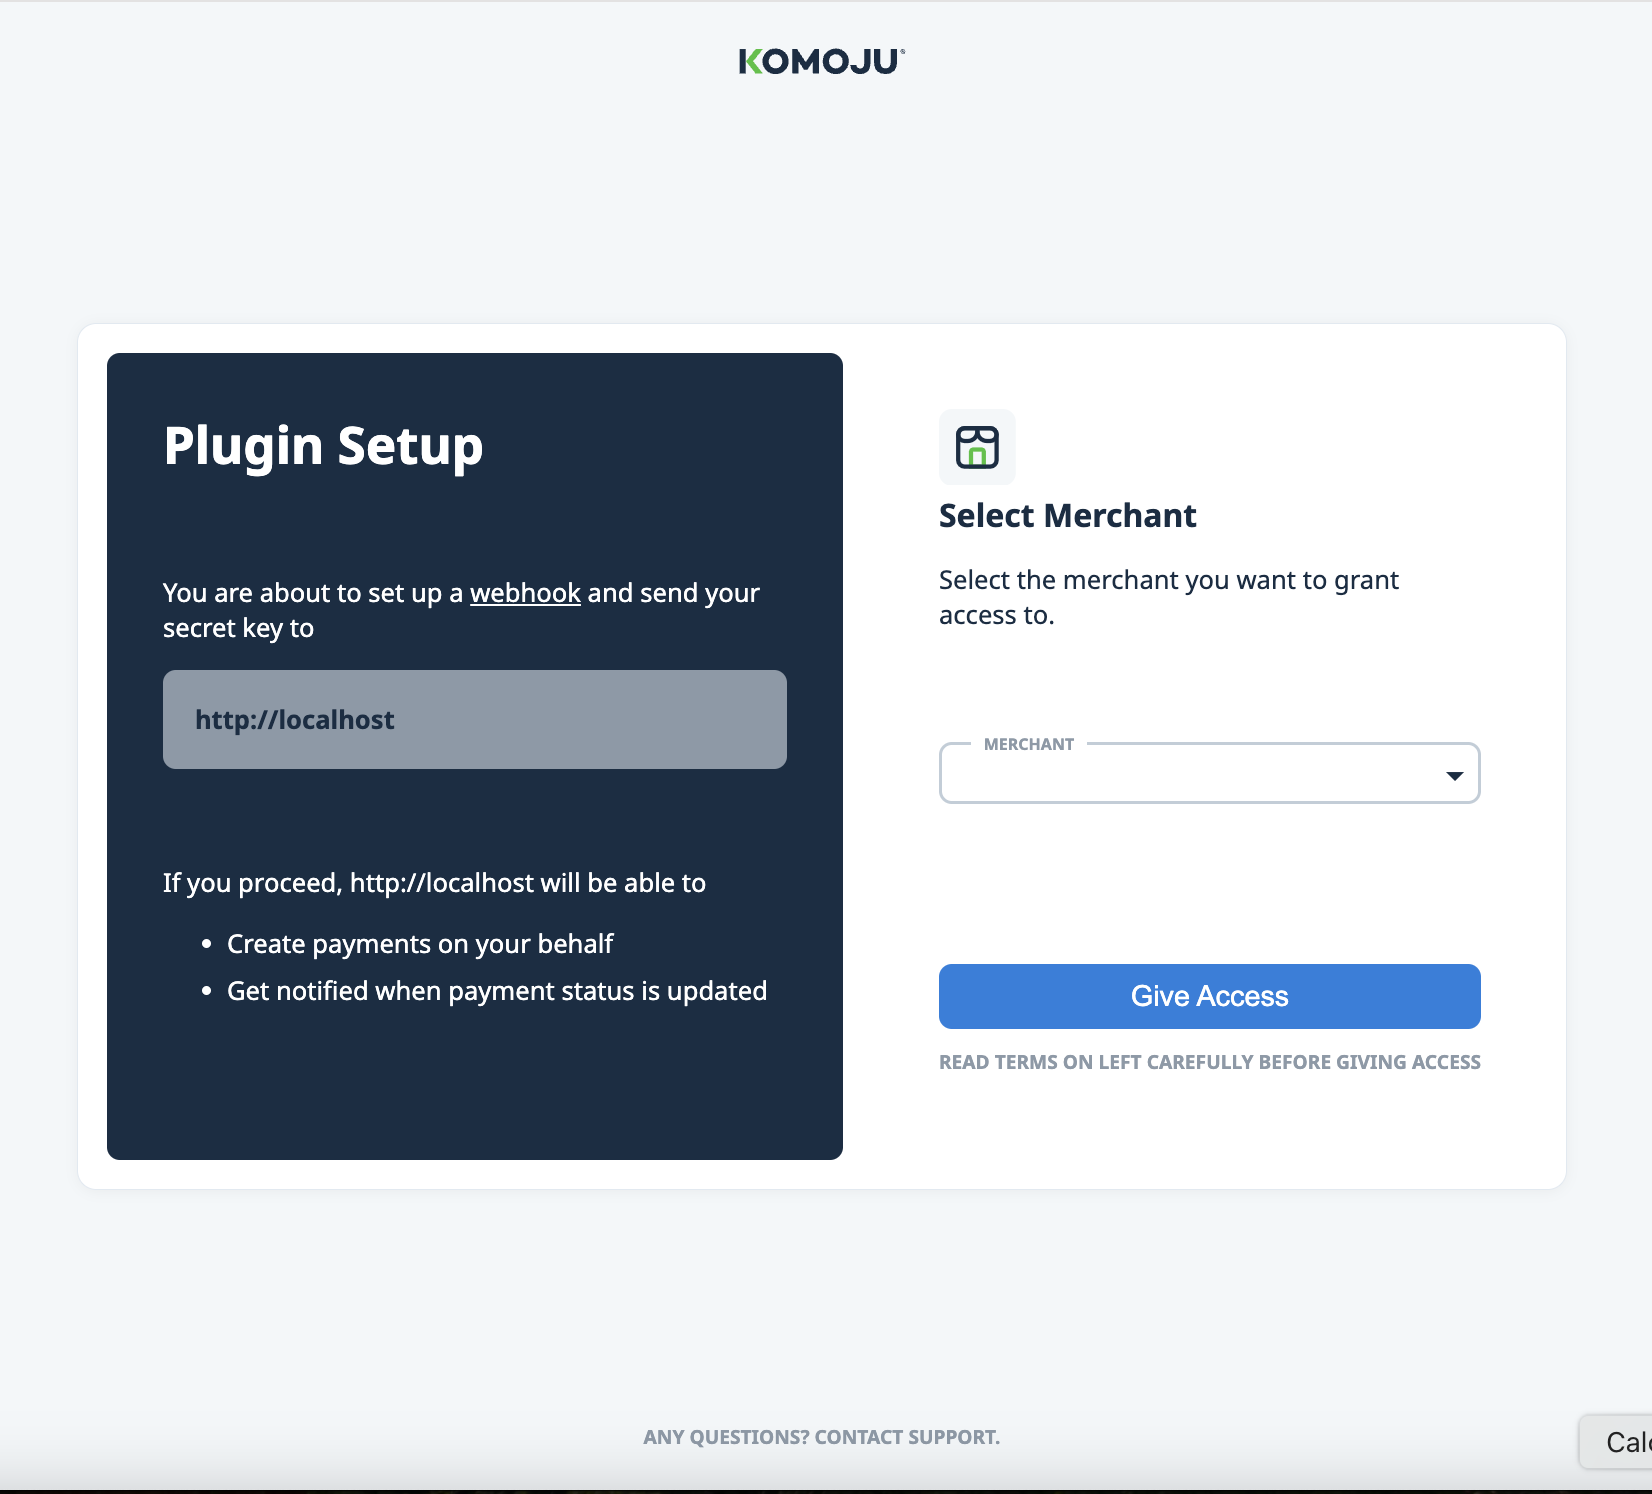
📌 Step 5: Select a Merchant
- After logging in, select and link the merchant you manage in your KOMOJU account.
- The linked merchant will be used for payments through WooCommerce.
Prerequisite: You need to have a registered merchant ready to go.
📌 Step 6: Choose Payment Methods on KOMOJU
- Go to the KOMOJU Dashboard and select the payment methods you want to use.
- Enable credit cards, convenience store payments, bank transfers, etc., according to your needs.
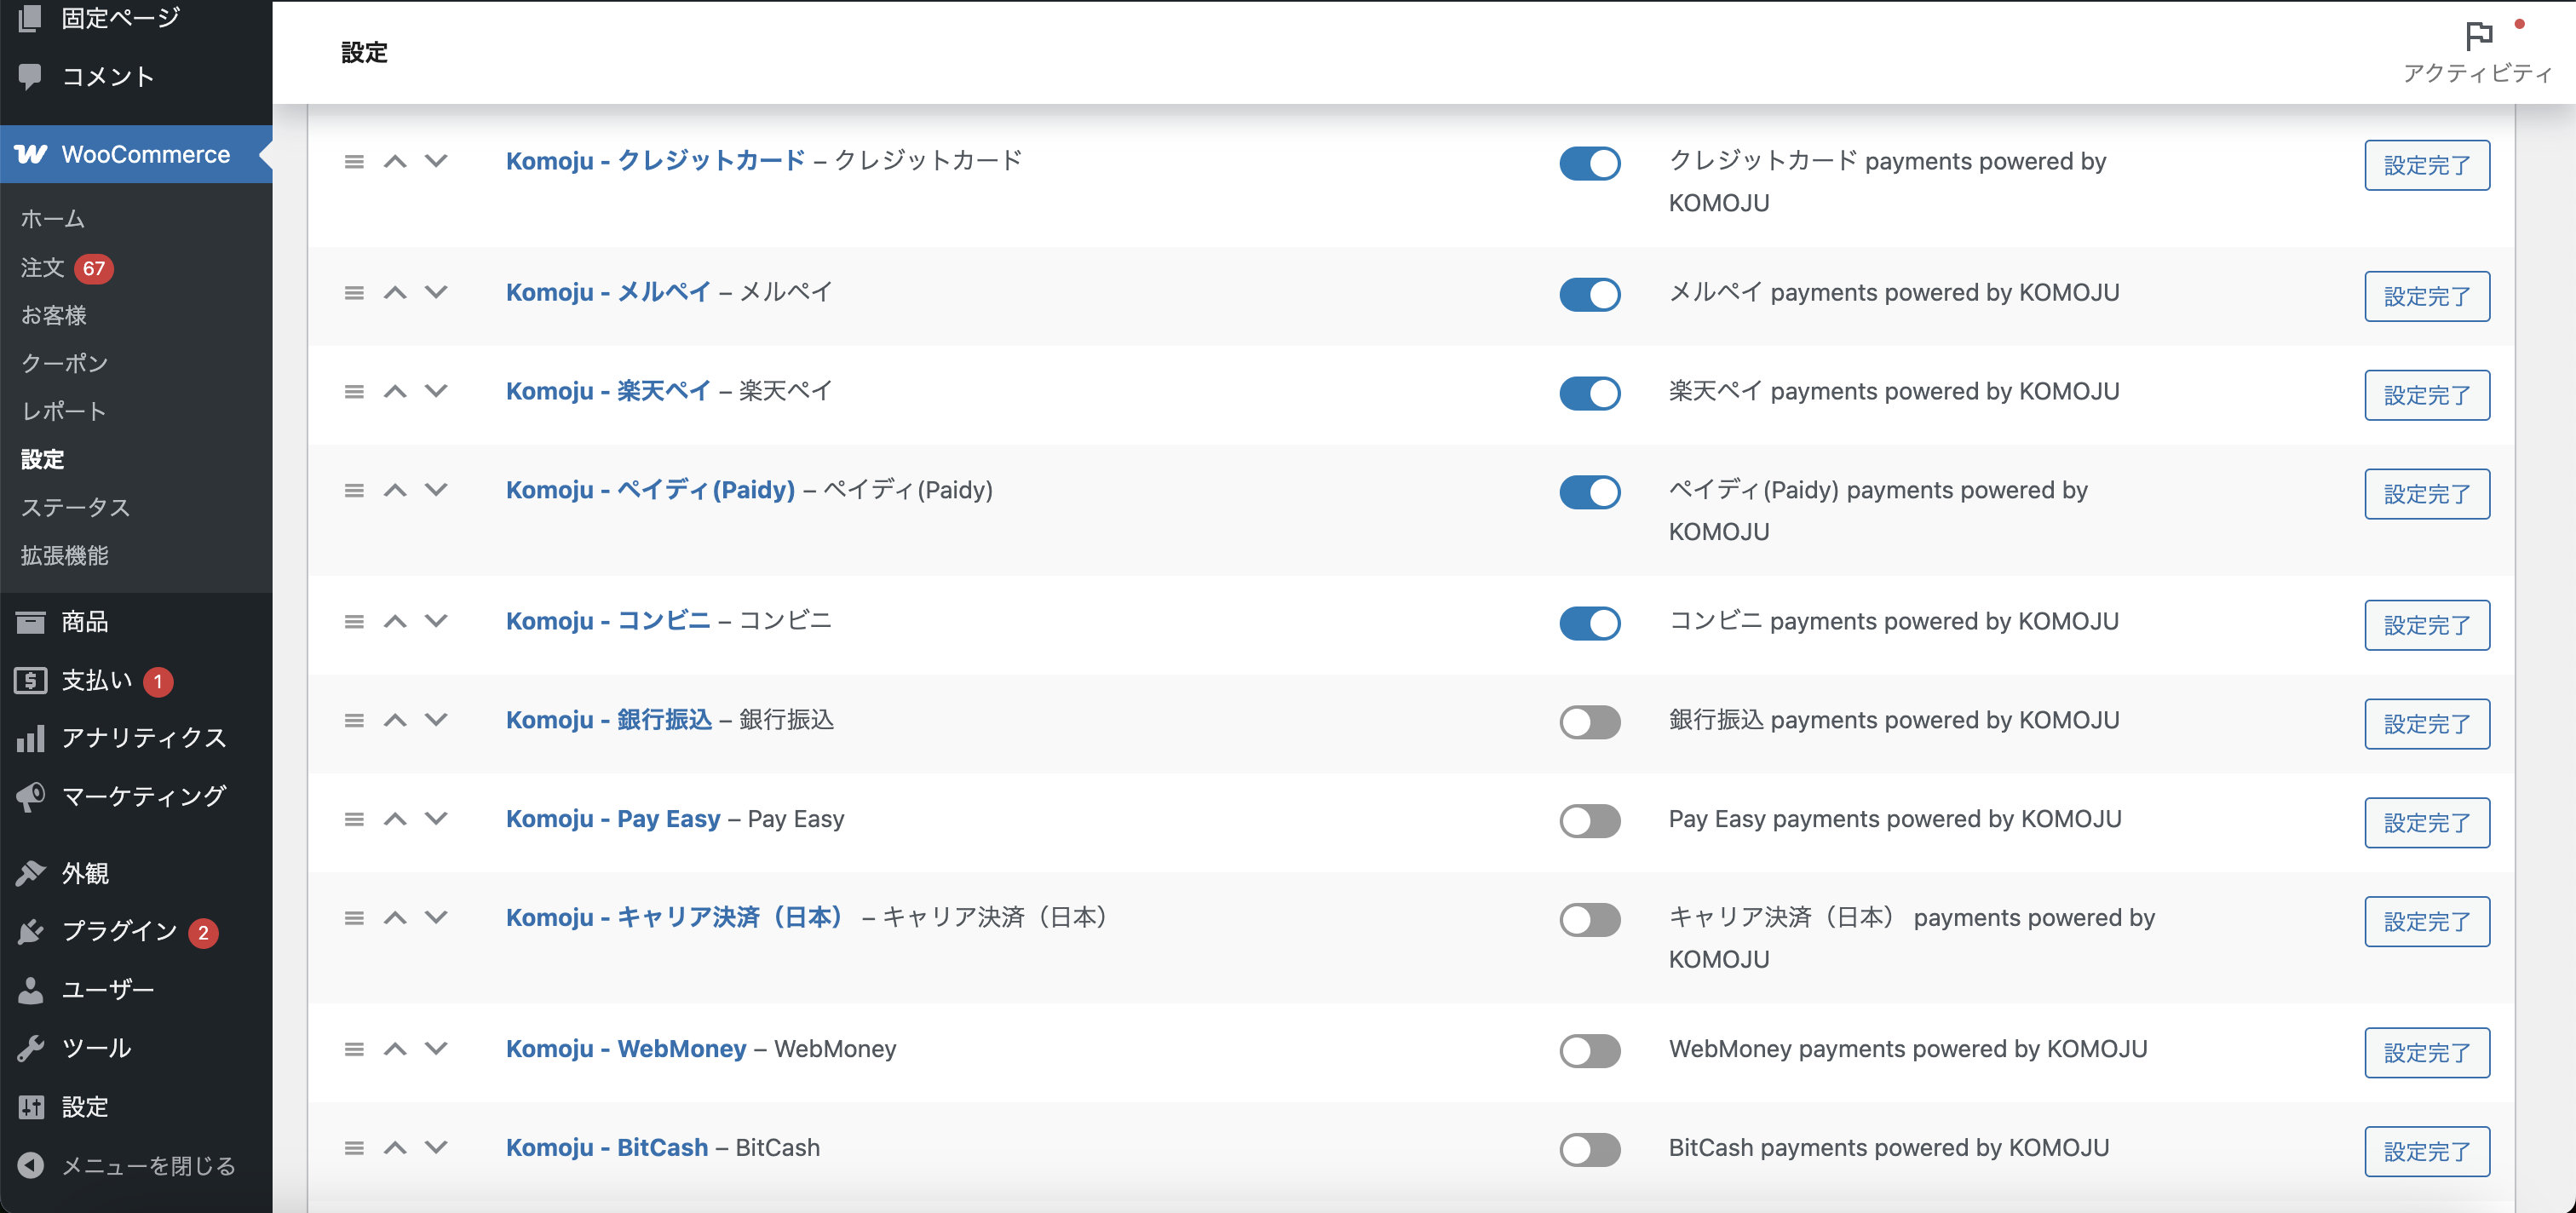
📌 Step 7: Select Payment Methods on WooCommerce
- Go to WooCommerce Admin > Payments.
- In the payments tab, enable the payment methods you wish to use.
That's it—you're done! Great work.
Related Links
If you have any questions, feel free to reach out.